Creative Ideas
I had a few spare hours today so I played around with the table setting...I cut up an old rug for my centre piece and made a nice wee tray from some scrap garden wood for my centre piece. I antique waxed the wood and added some handles I found in a second hand shop a few months ago..JD helped me shorten the wee handles as they where to long .😊 I think it will be lovely when its all dressed 🙂


I added a shelf onto my Lord &Lady sign it just looked like it needed a wee something! I used a bit of garden wood and stained it in the same stuff I used for the sign. 🙂 I attached the brackets onto the sign itself. 🙂


Ive had this typewriter in the garden for a few years and when I moved in with JD I just had to bring it with me!!!


I had a wee idea...I wanted some sort of hand grip at the top of the stairs but it was a small fortune for one. I bought a couple of used wood Balusters from eBay in hope JD could cut it down for me..I got the used wrought iron bannister brackets from eBay and JD made my hand rail! …Its perfect.....and I love the colour of the old baluster too!


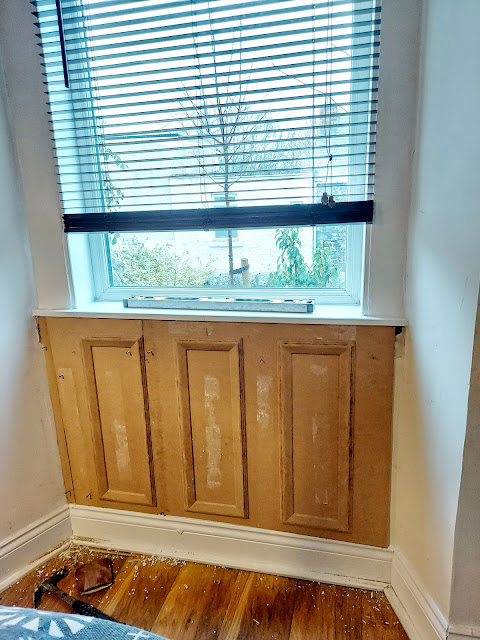
The bedroom cupboard, first I took the door off and then I painted it white. While lying in bed last night I thought l should paint it dark it would tie in the hallway and lower level rooms and give a more cohesive feel..I took the pic from the Livingroom to show you what I mean about it all tying in. 🙂


I made a gallery wall a few months back and I thought about putting up some picture ledges but I went with a flat gallery wall instead because we were doing so many projects at the time but I just wasn't able to put on show everything I had collected or made. I asked JD to build me these picture ledges over the weekend and he done it for me in lightning speed!!! I love them and I get to put up fairy lights and all my wee bits I just couldn't show on my flat gallery wall. I've still to mess around more on this but this was how it turned out. I love it.. I stained them in walnut...would have liked them a bit lighter but its all I had in the shed 🙂 There's plenty room for another row of artwork underneath as I collect more.


So happy with how my tile rug turned out!!! JD framed it today...So the framing is only a few mms thick... less than a rug! I wont trip over it and I wont stub my toe! Its smooth and rounded...it feels flat under my feet and its at a bit I dont walk on anways ..My table, chairs and bench will all sit on it 🙂 I love it!


I am making a basket lightshade for our new hallway cubby that JD built! I want to get this right as I love my baskets and the thought of ruining them doesn't sit well so I want to get this right first time which usually doesnt happen with me at all. I choose number 3 because its much bigger, more of a statement and it lets more light out!...I did like the other two but they just seemed so small and insignificant compared to number 3 but they had lovely shapes and colours. I will post up later the gorgeous workmanship of JDs garden wood cladding he done on the interior.x I will be taking the handles off 🙂 I may also spray paint the basket as its a bit to woody in this cubby at the moment..


The next layer is going on the panels we made from the cheap doors in the house. I used wallpaper I had bought months ago it is a Kylie Monogue paper, it has a lovely texture. Im going to do another maybe 12 inch band going around the top of the panels and then a wood trim. Im thinking painting them green or black and green above..cant make my mind up! I may also add another layer of texture over the panels..we will see!


We had a few of those lightweight doors we were going to get rid of when I had the idea to saw them in half and make some wall panels with them I flipped them so the back is the front as they had a raised back and wouldn't have been flush with the wall.. JD put them up for me and made them fit perfect... hes bloomin good!. Im going to plaster stencil the inserts and paint them :) The other half was used as cupboard doors :)


The cooker extractor hood was annoying me! its just looked so shabby! I wanted a nice finish around it but we didnt have any trim left so we cut down some polystyrene coving with a pair of scissors and no nailed it on...it looks so much better. Its just the little things that make it so fresh looking. Jims freehand mitring was pretty good too!!!


I found a copper bracket and an old broken solar wire cage from the garden and Jim hung it for me on the pallet wall...I like it!
I wanted something for my table without having to run out and buy. I found a soft buffalo check rug in the cupboard so I decided to half it in two and run its horizontally along the table.

We have been spending so much on decorating materials I had to try and cut back somewhere..I decided on all handmade signs on the tree. All made from cardboard or hardboard .

I made these napkins for the table from some spare fabric (I only had enough for 3 hehe) . I will never tire of harlequin, stripes or spots, never ever!!!
I painted the shutters in grey and distressed them slightly to show through the beautiful dark oak. I made some faux brackets with some hardboard and my jigsaw and painted them black.


A bit of tiled Anaglypta behind the stove..Painted in black and then I dry brushed some bronze and copper paint. I also painted the old firesurround black.


I wanted to put a bit of greenery on the pallet wall we just built. I used a wine box gifted to my partner the year before. I just painted it dark and put a few wee bits of metal on the casing. Its perfect for a wee plant on the wood wall.
After


Now that I'm sharing a living space with my boyfriend I'm having to deal with all his clutter as well as my own! We shall start with Xbox games! What to do with them. My partner already had an orange pine table and I was given some wooden wine boxes form a local man last year they just lay around the shed holding bits of wood and tools. My idea..paint the table, add a lid on the box and then some castors on the base to roll in and out smoothly from underneath the table.


How beautiful is this...When I sanded back the dresser it had a red tinge to the wood..now im not sure if its cherry or mahogony..Im not good with woods! I didnt really like the red..so I darkened it with black boot polish first, then I added a tan shoe polish over the top...Then I added a clear shoe polish to the top and buffed it in...

Yesterday I took my dresser outside and sanded back all the layers of paint off the top, I used paint stripper and a heat gun....I stained it with black shoe polish..then tan shoe polish...the natural shoe polish....I love it!..I need to chnage out the knobs but look at the wood..


Oh I'm so excited. Inspiration has struck!!! its only been like 6 months haha!! Anyways after fixing my wallpaper I decided I needed a shelf. I thought what about my garden riddle its really sturdy...I'm going to make a shelf for inside it...this is the fun part though. I used dark tan shoe polish to stain it and I love it!!!


I made this from hardboard and a nail gun. I printed off some papers and decoupaged onto some of the drawer fronts and some of the fronts I stained with kids paint. I also used some original 60s knobs and wee bits of metal to dress the drawers up. You can see how I made it with a nail gun all the wee nails hahaha. not sure I could do this again even if I tried!

Im not really feeling the need to change anything in the house at the moment...Im blaming the covid maybe its a combination of the slower pace in lockdown and me getting a wee bit older and starting to enjoy my space! Remember my Ikea moppe revamp..I stained the drawers with different colours of watered down brown kids paint, decoupaged some of them with papers I printed and some I done with faux suede fabric. I made the wee mini handle from faux suede fabric to.

I wallpapered my fire and wall using Anaglypta wallpaper. I think it turned out gorgeous
I mixed up what was meant to be a dark petrol blue..I wanted it to look like the farrow and ball Stiffkeyblue.
Lighting is bloomin awful, just so dark!!! Looks grey!!! Nooo im not a grey person!


Black & white floors...I think I like them...can you tell?

A wee digital illustration I done a few years back of Gabe.

I wanted a wee jar to keep my matchsticks in...I used one of my spice jars and glammed it up to match in with the Christmas decor ..Thats what happens when I have a spare hour hahaha

I made the J from an embroidery ring & the Y from some hardboard.......A little Joy in the hallway!

My beautiful vintage mirror fell off the fire surround and broke into a million pieces
Anyway ...I wallpapered the backboard, pinned on my most favourite gold bug and hung from my picture rail with some gold chain..a wee bit of faux Taxidermy...lol..I know its not to everyones taste but I love him!


A happy accident?
Im not sure about this one.


Yesterday I made some cushions from the leftover roman blind materials.
Today I have to take down the wallpaper I put up in the bathroom yesterday because I ersed it up!!!

Painting Grouted Tiles: This idea I stole from my friend Leeann Harrison..The only thing I changed was the kind of paint I used..I used black chalk board paint with a touch of white ..I wont lie, this is a tedious job and takes patience..leave it to dry completely and then scrape off excess with a dry cloth and fingernail!
The finished tiles :)


I fell absolutely in love with a stripe black and white blind online but it was £107.00


Still doing lots of work on the bathroom..
In between painting my taps/faucets (first coat is on, im painting them antique gold)😬🤔🤭
I made a bath rack from some leftover shelving and some gate handles.


Im making a bathroom sink backsplash..not sure if its going to look alright lol! My whole house is turning green, black and brown!! Im just layering a few or ten layers varnish over the top of my wallpapered and painted board that im going to insert at the back of the bathroom sink.

Cheap handmade wood stain: Im making some shutters for the bathroom and im staining them with water and cheap kids brand brown & black paint. I just put a good plop of the paint in a tub and add water. Once ive put on a few coats I coat in a nice yellowy golden yacht varnish which brings all the colours out. I have only done 1 coat on the pic..ive still to add a few more coats and the yacht varnish.


Trying to make my faux corner fireplace I built in the hallway a few years back less faux looking!! Ive used some leftover paint and wallpaper and tried to create a wee bit more depth..I wanted a plain colour block hearth because the hallway is so patterned

A little project I done yesterday on my day off...Some wooden stars....Im not sure they are staying here I actually had a type of wall or window hanging in mind...

The lights are in the wee handmade Merry Christmas sign..made from my broken hanging sign :) Not sure if I prefer it without the lights...

My wee vintage flour tin I found in the bin years ago is now my Christmas Cheer tin... I made the lollipops from some 6mm dowels and 10mm hardboard :).
Help yourself to some Christmas Cheer lollipops.
The sticker on the front peels off so I can use my tin again the rest of the year.

Just a wee bit of decoupage on some wooden boards...Numbers 25

I wasnt happy with the recycled embroidery ring letter J it was to small.I made another sign for the back of it I think the proportions are much better now.

Took me bloody ages writing this on my Studio room chalkboard last night...🤣🤣 I am no Calligrapher...

A wee sign I made last night from a broken christmas decoration..I recycled the letters from it. I painted a bit of wood already in the shed, glued and nailed the letters on, Ive drilled holes all around the sides because I think I may have to add something more..lacing or something.

I got these wee metal herb pots years ago in a gift. I recycled them with a bit of decoupage and they are still going strong. These where a bit like making a lampshade cover its the same method. I notch on the pot and on the paper my starting point and roll them at an angle and mark where it finishes. You could use self adhesive printing paper for these to. I didnt need to redo mine they are still going strong 3 years later! I ve used them as my mini Christmas tree pots this year.

Candlestick Covers: Self adhesive printing paper: I had a couple of old yellowy candles and I wanted to add patterned candles to my festive mantel I had some of this self adhesive printing paper in the drawer so I just printed out my most favourite pattern of all time and wrapped it around the old candles...not sure how they will burn but burning wasnt my main concern it was how they looked lol. I also painted the old candlesticks with some gold paint

I made this wee Christmas tree in the shed last night..its not perfect and I could have placed the holes better..it reminds of the game ker plunk! All you do is drill holes in a thick dowel..very easy

My recycled JOY letters. For the letter J I used an embroidery ring, cardboard and paper bunting. For the letter 0 some more recycled cardboard and for the letter Y the base of an old drawer which I stained. I found a wee angled peice of wood in my shed and made this wee shelf which I stained to sit all my letters on

I am so excited..I love Christmas time...not the actual day but the sparkly decor..everything is so beautiful. I found this wee nutcracker in a charity shop (this isnt a pic of him I forgot to take a pic but he looks very similiar ) I ripped off his hair and beard and sword and added some wee ornate bits n bobs and painted him to match my current Christmas colours...Can you see I still have a thing for black..looks like this dark obsession is staying a while hahahaha

Its the most wonderful time of the year!!! hehehehehehe and its here for me!!! I made this little bag this morning, The reason I like it is... it took 5 minutes to make and it sits up on its own because of the faux leather used


Halloween Coffin :)

ust plain odd!! hehe..Finished my work and its now play time......

I got a this wee half bust from TKMAXX ..I used a large candle base as the body and glued the bust on to it and made her a nun outfit..she looks fab! a we bit scary though..had to shut my bedroom door last night ..she was staring at me!!!

Just a wee handmade witches broom to go with the recycled encyclopedia


Recycling some of those frames I had in the she shed into my Halloween decor
I havent finished ..cobwebs are most definitely needed..

I found a couple of these encyclopedias in a charity shop. I used wallpaper, chalk paint and some embellishments perfect for my wee Halloween mantel.

So I promised my son I would do Halloween this year!
I dont mean like full on, just a mantel.
I made some bunting this morning, using illustrations from one of my favourite artists
..Edward Gorey ..

I just wanted to share this wee chalkboard lettering tip...I used self adhesive (sticky back) matte white paper, I printed my letters out ,cut them out and stuck them on

Ive been getting some woodworking lessons a few times a week.
Thank you to the Selkirk Shedders
This wee spice rack took me a week to make.
It has been a labor of love!!!!
Each shelf hand chiselled with my own chisels that I sharpened....I love it!!!!


If I see another hearth !!!!!!! Ive settled on this one...I liked the small black and white pattern but not with the white being more prominent, I loved the green just not in the kitchen it looked like Christmas! I prefer this large black and white with the black blending more easily into the black painted hearth.

A wee kitchen cupboard project...Its the wrong yellow..for the life of me I couldnt mix up the right colour!!! I will have to do the frame over again....A wee colour pop and somewhere to write what we are running out of..Im forever writing down on wee notes and by the time I go shopping I have lost the notes!!!

Black boot polish distressing: yesterday I gave my fire surround and mirror a much needed coat of paint. I used normal white wall emulsion, top coated in polyacrylic and then rubbed some black boot polish on for some distressing. Im actually thinking about doing the fireplace matt black, what do you think?

This is my wee Ikea Moppe revamp..I hate the legs so they are getting changed...I still enjoyed doing this wee piece..handmade stains using kids acryllic paint, decoupage and the top and bottom made out of some old shelving

Im so proud I built this from scratch with some 9mm plyboard a nail gun and a not so sharp saw...The knobs and legs are recycled. Some paint and decoupage. I have nowhere to put it!!!! I dont have any space!!! I am proud of it though..it has some nails protruding...a few lumps and bumps..and it is so not perfect but I made it !!! its really quite big although it doesnt look it in the picture..

A wee quickie project...sewing machine base revamp. The wood base was a tad boring for me...I walloped some chalk paint over it..slapped on a bit of wallpaper and added a few hinges....its a wee bit prettier and I havent affected the mechanics of it.

Handmade Plant Pot Cover:
I made this a while back and now I have somewhere to display it...in my hallway ...

I think these little guys are gorgeous...
first of all because they cost nothing and I can update them at any time without any cost.
They take absolutely minutes to make.
I love them because I made them and they are functional.
Just four more to go :)

Scrap Fabric Door Handles:
Im finally doing something about those horrible pine doors in my Studio.
Im staining them white and im making these gorgeous handles all in different designs for each door ...6 more to go..
I just interface the fabric with the strongest interfacing and sew seams all round..
Im using upholstery tacks to attach them to the doors.

Im off tae bed..but before I go...Cookbook storage. I took the original door off and made these little fitted shelves for the books, I then made a hinged shutter door from some leftover wall panelling..put on some new handles and then chalk painted it all over.

A before and after of the pine fire surround repurposed into a shelved rack for my jars in the Kitchen :)

10 year old very tatty red faux leather storage boxes so ready for a new lease of life..
These took longer than expected...
2 days for decoupage and drying out times!!!
I used decoupage, and mixed polyfilla with the chalk paint to stipple effect the lids and bases..
I also used a few upholstery tacks as feet and for the lids for decoration.
Not much but nicer shoe storage for me and saved from the bin.

Just some sticker fun...My ikea lamp in my studio was screaming out for a wee colour pop!!!

From shortbread hamper box to lavvy roll storage . A wee lick of paint and a doillie stapled onto the back and it holds 4 toilet rolls and makes a nice wee stand for my new lavvy roll brush :)

I was so sick of the tin toilet brush holder I had..it was all rusty and just looked yuck!!!
I found a vase I had bought second hand a few year back and a plate from the charity shops and I think this is much better solution.

I got these Green tiles at a bargain price in the reduced basket in B&Q...
I knew exactly what I wanted to do with them...
My door step was a mess these would be just perfect for a front door face lift.
My fingers are all cut..Im even having trouble typing this 🤣 that's what I get for not wearing gloves...

I really miss drawing.
I spent a few hours drawing tonight and so enjoyed it.
It was so therapeutic not creating to sell..

She has got to be my favourite by far!!!
I love her copper hair and copper trim...
Feels nice to recycle some of that cardboard into something.. rather than throw it!!
She has pride of place on my Christmas tree beside some folky mini clogs I found in a charity shop a few years back.

Using up all of that extra Christmas cardboard with some decoupage and copper foil.
I never get tired of this wee guy...
He is gorgeous & I do love cats
He is actually copper foiled around the trim but you dont see it in the picture. :)

Still playing around with the recycled cardboard..
I made myself a wee music tape for the tree..

I bought Frank a few years back ...
He was looking rather lonely on the love seat....
So I made him Anna....
I think they are a perfect match....
#theonlyonesgettingitoninmyhouse

Last night I was playing around with some leftover cork sheets from my studio wall and some cardboard tubing I had hoarded !!!
I made this little trinket box with a dalmation decoupage print.
Im going to order a gold colouring pen..I think Gold trim would have been nice than just leaving the cork showing..

A wee update on the paper clips lol..
I decided on wool wrapping the clips together in different colours...
Never again it took over 4 hours and I was nearly greetin!!!!
For me it just so started to look like a memo board so thats what it became.....


I thought a good idea would be to make Christmas tree in this design and hang cards and vintage ornaments from it... (another time)..
Next on the gallery wall will be (I hope) my XL paper clip art....
I just need to figure out how to attach it together...:)

My Gallery wall is coming along nicely...

Ive been trying to draw again after quite a long break...YEARS!!!
Ive been working digitally for a long time now and kind of forgot how to use a pencil..
I started drawing again a few days ago..
I forgot how excited I got over new art materials..
Waiting on my pencils and sketchpad arriving was soooooooooo exciting!!!
I used coloured pencil and ink and mixed it in with some digital stuff.
It felt so nice drawing again..
Fruit & Cacti Vegan leather fabric print.

Hello..I posted about my plaster stencil wallpaper..I just wanted to show some detailing on my furniture with a stencil and plaster. No prep needed straight onto the furniture wait to dry and sand till smooth..(I dont sand I like them rough)

I have posted about my plaster stencil instead of wallpaper before..
I think you can get a better feel for it at night when the lamp hits it...

More picture from a long time ago...
Charity shop picture frames joined together to make a wall hanging.
Metal flour tins found in the skip used as my vases.
Re-vamped singer sewing case.
Lots more ...lol...

Sometimes its just the simple things..not the most ornate or elaborate..just making a simple shelf from something that would be going to the skip.
My son got a new chest of drawers for his room so I took apart his old one which was really falling apart and used the sides to make a deep, high up shelf for my bedspreads.
I put it together in an less than an hour, the painting took a few days a wee stolen hour here and there when I got the time.
Ive still to dress it...its so simple and useful I think it will look nice once it has the bedspreads on it.

I was online searching for some of my older products when I came across some images I hadnt seen in ages.
My house doesnt have any of these things in it anymore...
Red fridge and kitchen floor are still here...
I miss all of the interior crafts I used to do...its not until now I realise how creative I was in my house.
All my creativenessesss goes into my shop now :)
Its a bit of a mismatch...
Theres a wee bit of decoupage, fabric flowers, painted furniture, handmade boxes, suitcase shelf and D.IY breakfast bar crafts in there...

Im needing a little inspiration for the studio.
I have my patterns hanging on a modern valet stand at the moment.
I wouldnt mind some new fresh ideas on how to store these.
Maybe something coming down from the ceiling to hang them on..

I had some time off yesterday so decided to put it to good use and paint the ever flaking, cracking door...:(
So I went to get my paint out the shed and nearly everything was off.
Must have been the extreme cold and then the extreme heat we are having.
I found a tin of Ronseal fence paint in what looked like really good health lol..
I re-painted the door, the window ledges, the front doorstep and some of the surrounding bricks :)
Not bad for half a tin of paint.
Ive just ordered some fairy lights to put in the paraffin heater for a wee night light. :)

I got some slabs delivered for the back garden.
I was more excited about the pallet than I was about the slabs...
I had a few spare slabs..some queen anne legs leftover from another project..
A wee bit of measuring and sawing and I had a a wee table to park my bum with my toast n tea :)
This took just under an hour last night... easy-peasy...

It doesnt look like this at the moment...The bunting is off..mIldew is covering the decking..My sign is all weathered and beaten!!!

I dont make myself anything very often...
But I really do love this print.
I made myself quite a large Hanging Pin Cushion..
May make some mini ones for the shop...

I Glued on the rope with PVA..
I put a few staples in it to keep it in place until the glue had dried.
I bought one mold from ebay and made a cast of it for the the other molds.

I really do love working with plaster.
A wee touch of Art Nouveau plaster around my Nouveau Mirror.
Some Highlights of plaster around the band of the Ceiling..

Find a box you like the shape of..

The paper tiles up and down the side of the fire are about 5 years old and they are still going strong.
The decoupaged hearth is around 2 years old and has some burn marks but that was to be expected.
It still looks good though.

Gather your materials...
P.V.A,
Paper or fabric.
Varnish (I use a water based Varnish with everything)
Scissors & whatever you are covering.

Ok so I wouldnt lean on it.....

I have lots of sheets of beautiful scrap prints left over from projects..I never throw them away I keep them in a drawer for something like this...

I printed off pictures of Victorian tiles using matt photo paper.
I just measured the tiles and recreated the same size print.
I painted over my exsisting tiles with matt emulsion (latex paint)
I cut out the tiles and P.V.Ad them (white school glue).
Once I had gently flattened them I left them to dry.
I went over the tiles with a water based varnish (about 3 times).

I work with a lot of paper and always have a ton of scraps.
These mini buntings are great way to use up all the scraps...

I always have lots and lots of cardboard saved..
from loo rolls to Cereal Boxes..
I made this freehand letter S from the Stash..

It looks nice when you open your cupboard and you have lots of patterned tubs.
Whats more lovely is recycling these containers.


Singer sewing machine.

I made this one years ago ..
Using all my little bits of fabric and lace to make flowers.
I just glued them on with a glue gun.

Decoupaged Dressmakers Dummy using leftover napkins..

Unwanted crates saved from the skip...
Decoupaged and a few handles put on..
Perfect storage for my sewing room :)

Decoupage tile transfers...


And all finished...
A few years back I made a fake tile hearth from patterned papers...


My cousin has just had a beautiful baby girl called Frankie...


A faux painted rug or a full floor stencil is the dilemia...


I do like a polka dot...


I have no patience whatsoever !


I made these Garden signs a few weeks ago using laminated card stock..


Im really not sure about this one...


I enjoyed making this soooooooooo much!


I am so super duper proud of myself !


Now here is some bunting I may actually leave up...


I have been wanting a Victorian tiled Harlequin hearth for way to long..


Use Macrame hangers and nice china plates to display your plants...


Ok so I fell in love with this absolutely gorgeous wallpaper....
It really is so easy and has such a great look when finished..
Ive changed the wallpaper 3 times this week!
Get printing...

Well it wont be long now till I start my furniture business...


Macramé they are not...It all started off well...


Beautiful!


I think I am going mad .....


I really really really want Victorian kitchen tiles but I just cant afford them...


Absolutely brilliant idea....


Now you know what my Saturday nights consist of lol...


I had some hessian delivered this morning to cover my Oak dining chairs.


Thought it was time to put good use to one of my old suitcases.


I have no patience what so ever...

Embroidery rings as frames

Low maintenance....that's what I wanted in a Tablecloth..Every time I had visitors or cooked in the kitchen I would spill something over it. It spent more time in the machine than on the table. I could have made two and swapped while one was washing but I couldn't be bothered!!! Decoupage and several layers of varnish was the answer.

Vintage Tablecloth into Kitchen Door Curtains

Cheap Dolly Peg Rails


I was looking to buy some mini wooden bunting but I wasnt going to pay £5 for less than a metre of it so I used some of my spare kitchen Vinyl tiles they are just as nice.

So pretty..Im painting it in plaster so it looks like the real thing, havent finished yet. I am going to add more mouldings around the outer circle to make a design on the ceiling.

Plaster Lightswitch Cover


Kilts were my income for years!!!

Made these for myself :)


Oh I do like jars..........

 Love working with oilcloth.
 More slippers....
Pencil cases...I use them to store my tampax !!!
 My first attempt at patchwork!!!
 More slippers


 Pencil Case
Kilt


So many ideas, my head is whirling, you are so clever and the detail in your work is outstanding. You inspire me... with that, I'm searching through my scrap and art supplies looking for something to get my hands into! Thank you for your blog, your photos and your incredible artistic eye and capabilities!
ReplyDeleteaww thank you Nina for your lovely comments :)
ReplyDelete